Sunday, January 17, 2016

3 Organizing Tips when Working with Children

Make time to tell your child one specific thing you really like about them as a person.  An example might be, the way they share with others or how they stay focused on a task.  Make sure you are sincere and they will beam!
3 Organizing tips to get you started:

You want to help your child organize their room, but feel so overwhelmed you don’t know where to start.  I have been there many times.  Allow me to hand down a few guidelines.

1.       Keep it short
              Avoid the mistake of trying to fix it in one fell swoop.    Children (and parents) have short attention spans when organizing.  Try breaking it down into small sections and tackling one at a time.  Clothes one week, art/craft supplies next week, etc.  If you have a weekly cleaning schedule, add 15 minutes to the routine to work on a different section each week.  Be sure to tell the children the time and specific goal so they know there is an end in sight.  Maintain areas you have organized with a 5 minute daily pickup and weekly cleaning routines.

2.       Plan a reward
              Cleaning to upbeat music played quietly in the background works wonders for us.  Having something fun to look forward to when finished is also important.  Video game time, playdate with a friend, or ice cream are all great rewards for hard work at the end.  I always try to remind them of the coming reward as we work.

3.       Remember your goals
What is YOUR reason for getting organized?  To make cleaning easier?  To find what you’re looking for?  If your child has allergies to dust mites, then learning to keep the environment allergy-free is an important habit to teach.  Everyone’s personal standards are different from everyone else’s.  Don’t hold yourself (or your child) to your neighbor or your best friend’s standards.  Also, keep in mind that your child’s standards are not yours.  Help him (or her) find their own way of organizing, especially as they get older. 

What would you add?  I’d love to hear your organizing tips!

Thursday, July 3, 2014

Building a New Window Planter for My Wife (Call it a Flower Bunk Bed)

I recently built a new window planter for my wife for her birthday. It replaced the old one that I built for a birthday present about 15 years ago. I had to tear it down a while back to have the patio replaced. It had survived the North Florida elements for about 15 years and was due for replacement. 

For the base on the replacement I used standard 5 step treated 2x10 stair stringers that I purchased at a local home improvement store. To make the project take less patio space I turned them upside down. The plant shelves are made from that recycled plasticy simulated wood material that is supposed to never rot. It comes in 3/4 x 11 inch dimensions in 8 foot lengths. It is remarkably easy to cut and work with using standard woodworking tools. Since the pots are in direct contact with it and hold water under their bases, I thought it would resist rotting way better than standard treated lumber. I used stainless steel trim head screws to secure the shelves to the wooden stringers. To make it stay put and support the stringers, I used two of the typical framing lumber hangers found in deck and floor construction. All in all, I would say that it was one of the most enjoyable projects that I have done in years. My total cost was about $175 without the plants (my wife already had those). Below are some pictures and captions. I would be happy to answer questions to the best of my ability.
 

to this.
From this....

 Flipping the stair stringers takes considerably less horizontal space on the patio. I put a good coat of water seal on these to protect them since they are exposed to lots of waterings. I paid special attention to coating the cut ends and end grain.


One of the footers with a typical galvanized joist hanger holding the stringer. I made forms from scrap plywood. Our patio is on a slope to facilitate rapid drainage so pouring footers for these allowed me to level them and raise them to the correct height. I secured the new concrete to the old by putting 2 - 2 1/2" concrete screws under each (tapcons) halfway into the existing patio and set the form around them and pored the concrete. these pads keep the wooden stringers from touching the patio allowing them to stay dryer and prevent them from rotting.

I notched the shelves and added a guard rail to the back and a rim to the front and sides.

I cut holes in the top shelf and we bought matching pots.


View from inside the kitchen. The lower pots make the view better.

Notched the shelves on all but the lowest. Note the guard rail in back. The corners are cut to allow water to run off.

Side view. The location gets a few hours of full sun and lots of indirect light.


Another view.


Take care and work safely,
Patrick Phillips
www.BunkBedsUnlimited.com

Friday, March 28, 2014

Building Triple Bunk Beds

Want to save space in your children's bedroom?  Think you can't build a bunk bed because you've never done any woodworking project before?

Here is one family's story - a first-woodworking project completed in one weekend - a triple bunk bed!


http://meetthelaings.blogspot.ca/2009/06/tripple-bunk-beds-thats-right-i-said.html

Saturday, August 31, 2013


Loft or Bunk Bed plan and hardware kit giveaway!

To celebrate September and Back-to-School, Bunk Beds Unlimited is offering a free plan and hardware kit (valued at up to $71.15) to the winner of our random drawing giveaway.

The winner will receive a free (pdf) plan emailed to them, plus the hardware to build a loft bed, bunk bed, or triple bunk of their choice.
 

And so... to enter this giveaway, you have three choices of places to enter!  

 
HOW TO ENTER THE GIVEAWAY:

To enter this giveaway, you can: Comment, Share on Facebook, and/or Pin It on Pinterest. 

  1. Comment on this post telling us what you plan to build, ie: loft bed for teen son, bunk bed for grandchildren, etc.  
  2. Spread the word!  Share a link to this post on Facebook. Then write a comment telling us you shared this post via Facebook.
  3. Pin a link to this post on Pinterest.  Leave another comment letting me know you pinned it.

You can do ALL THREE to have three entries in this giveaway! 

The deadline is September 14, 2013 at 12 noon EST.  The winner will be announced shortly after that, on Saturday afternoon.

Multiple chances to win!  Enter now!


Here are some of the choices of beds you can build with this giveaway:

Loft bedswe have plans for two different heights (standard and tall), and three different mattress sizes (twin, XL twin, & full)


This is the tall loft bed for a standard size twin mattress.


Bunk Beds we have plans for several different bunk beds:  standard bunk bed, stackable bunk bed, stackable twin over full bunk bed, L-shape bunk bed, and triple bunk beds.
This is the stackable twin over twin bunk bed.


This is the stackable twin over full bunk bed.


This is the L-Shape bunk bed, which is a loft bed with a twin bed underneath.


This is the triple bunk bed which holds three standard twin mattresses and works very well in a room with standard 8-foot ceilings.

The hardware kit we are giving away will include the hardware for building the bunk bed only (not the storage drawers or trundle that you could put under the bed).  The winner of this giveaway will have the option of buying the hardware to add storage drawers or a trundle under the bed.


Monday, June 24, 2013

How can a family of six live in a one-bedroom apartment?

If you have children, then you probably have the same problem everyone with children has… organizing and controlling all their “stuff”. Raising six children for the last 28 years in a three-bedroom home, we have learned a few tricks that we would like to share with you.

However, before I begin, I have to admit that I have a lot to learn and it was made abundantly clear to me by a recent customer.

A family of six live in a one-bedroom apartment and she shared with us a video describing how they manage to do that with the aid of a triple bunk bed they built using our plans.

Check out this short video for some motivation to simplify, organize and declutter; it definitely inspired me!

 http://www.youtube.com/watch?v=KCPuaxOQp_o

You can also follow her blog Professional Mothering at:

http://www.professional-mothering.com/2012/07/co-sleeping-family-of-6.html


How do you think your family of six could sleep in one bedroom? Please share your tips and tricks with us!

Sunday, June 16, 2013

My Father’s Triple Bunk Bed Plans; 50th Anniversary

It was 1963 and with six kids (five of them boys all in a row), dad and mom decided that a triple bunk bed was the answer to our overcrowded bedroom. Dad built the thing being armed with his own triple bunk bed plans and a few simple tools.  I am sure that he got the basic idea from his times aboard naval transport ships during MacArthur’s island-hopping campaign in the 2nd World War, but how he came up with the actual design will always be a mystery.


I will say that the plan for triple bunk beds elicited far greater enthusiasm than our burr haircuts did. Dad was a much better military barber than a furniture designer but he still built us an amazing bed. No one else I knew had anything like it and and my friends were envious. Even if it did not qualify as one of the wonders of the ancient world, it was absolutely kid-cool. What it lacked in safety features and structural integrity, it made up for in novelty.


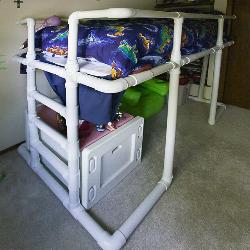
My best Rendition of my Father’s Triple Bunk Bed Plans (do not try this at home).

The posts were made of 2-2x4s face joined with framing nails (no screws were ever involved in the bed’s construction). He made it with ladder ends similar to triple bunk plans that we now make available. The ladder was made from 1 ½” diameter closet poles that were sunk into the posts with the old-school cordless drill - a bit and brace. I still remember those closet poles flexing when I stepped on them on the way up to Joe’s bed which was on the top. They never broke and I never worried because dad built it, so I knew it must be alright.

The thing that most disturbs me now is the way he built the mattress platforms. First of all, the bed was not as wide as a standard bed, it was only 32 inches which is the size of the hollow-core door slabs that made the mattress foundations. These were fastened to the bottom of the bed rails with framing nails. After a few years and a lot of growing kid activity, the nails began to pull loose. While resting in bed the platform would sag enough that we would be face to face with exposed framing nails pulled loose from the bed rails (yikes!). Dad’s solution to this problem was to put more nails in it. (Screws would have been better but it was a still a fundamental design flaw). This reminds me of the old saying that if the only tool you have is a hammer, every problem begins to resemble a nail.

The mattresses consisted of cheap 4 inch slabs of foam that we bought from an upholstery factory. I remember going downtown with mom to get them. Mom covered the foam with sheets and they served pretty well for small kids.

As our family grew up and the older kids moved away, more bedroom space was available so dad cut the bottom bunk off and made it a standard bunk which my brother James and I used it until were 10 and 12. James, my younger brother, kept his considerable collection of used bubble gum stuck to the post for later use. The old white painted wonder went the way of all flesh (along with the gum collection) when dad had it hauled to the dump and James and I got a new bunk bed from Sears and Roebuck.

Despite its considerably flawed design and safety issues, we loved it. It was the coolest bed around and served our large family for years. Based on what I know it seems a little scary. Actually, it seems a lot scary. Times have certainly changed.

If a triple bunk bed is in your future, why not spend a few bucks and get a plan that you can count on for safety and structural integrity. If the $9.95 is really a burden, I invite you to contact me and I will see if I can help.

 Happy Father's Day to all fathers everywhere who are trying to do the right thing.

Saturday, June 15, 2013

Bunk Bed Plans Safety

Building Safe Bunk Beds from Plans


Do you know how to determine if a bunk bed is safe for your children?   Bunkbeds are a great solution for children's bedroom sleeping arrangements, but safety first, right?

There seems to be a serious need for safety in the discussion of bunk bed plans available online. There are many, many plans to build bunk beds of all types but the idea of the federal safety laws outlined by the CPSC never seem to enter the discussion. (If you would like to read the CPSC ruling, click here.) Many of the plans that we see on Pinterest and other sites that show off ideas look great, but I would NOT let my kids sleep in them.  Would you?  The safety laws were adopted for a reason - to ensure the safety of children. All of our beds are designed to comply with the CPSC rules for safety.  If a plan that you are considering using does not address these rules, then it is probably a fair bet that those plans would not meet the rules.

I understand that unless you are a manufacturer, the laws do not apply. But doesn't common-sense?  As parents, we do everything in our power to ensure the safety of our children during their waking moments, so where they sleep every night should also be considered.

The Two Main Safety Issues, with Bunk Bed Plans: Falls and Entrapment


Let's discuss falls first. There are falls that occur when a child is climbing or playing on a bunk bed and falls that occur during sleep. Of course, the CPSC cannot prevent the type of horseplay that causes kids to fall when climbing or being silly. In all honesty, we have NEVER had any of our six children fall from any of our bunk beds. We have had two or more sleeping in our bunks for about 17 years and they have never fallen. That includes when climbing and while sleeping.

There are no guard rails at all, but it is free!
There are no guard rails, but it is FREE!

The falls that occur during sleep because there are no, or inadequate guard rails, to protect a sleeping child are completely preventable. Until December of 1999, bunk beds were not held to the standards that they are today. Bunk and loft beds did not even have to have guard rails in many instances. Others had only removable rails that just sat on the top of the posts or abbreviated guard rails that covered only a part of the top bunk. With the CPSC rules this changed. The law for manufacturers now mandates that the guard rail extend the full length of the bed (except in the space necessary for a ladder) and that they extend above the mattress at least 5 inches. These rules are in place to prevent falls and entrapment.

The guard rail spacing could cause entrapmnt.
Guard rails can cause an entrapment.

Now the biggest danger is entrapment. This is just what it sounds like - a child becomes entrapped in the structure of a bunk bed. Did you ever get your finger stuck in something and had great difficulty getting it out? Entrapment in beds is a bit like this, but when a child’s head or neck is entrapped, the outcome can be, and has at times been fatal.  We don't want you to be overly fearful about this; bunk beds that adhere to the governmental laws pose no threat of entrapment for your children. 

We now have CPSC federal laws for manufacturers of bunk beds. These laws are a result of a study of the science of anthropometry. This is the science that proves that humans move differently than Gumby. When applied to a bunk bed plan, you can come up with a design that is safe, functional and looks good too. If a bunk bed plan does everything you ever want it to but is unsafe it fails the first test.

Having said all of that, I would like to show a couple of pictures that make my parental instincts boil a bit. These are beds that people are representing as great solutions for children’s sleeping arrangements.  What do you think?

Too much space between the guard rails can cause an entrapment
The guard rails can allow a child through
OMG They are selling this one!
Guard rails are not safe. 
unsafe-toddlers-bunk-bed-plans.jpg
This is being sold as a toddler bunk bed plan.
It looks like the toddler will make it between
the rails with the exception of his head.